-
- Once you’ve passed both the Standard and Premium Editor Trainings, you will have access to make basic edits to text on pages. You will also have access to a variety of components.
- You will sign in at https://authoring.childrenshospital.org/user/login (see last lesson). When you log in, you will be on your profile page and you will need to manually navigate to the page you wish to edit. This is where you will begin the editing process.
- The next step is going to the page you want to edit — but replace the www in the URL with authoring. If you want to edit the Digital Health page, you will visit https://authoring.childrenshospital.org/digital-health, not https://www.childrenshospital.org/digital-health.
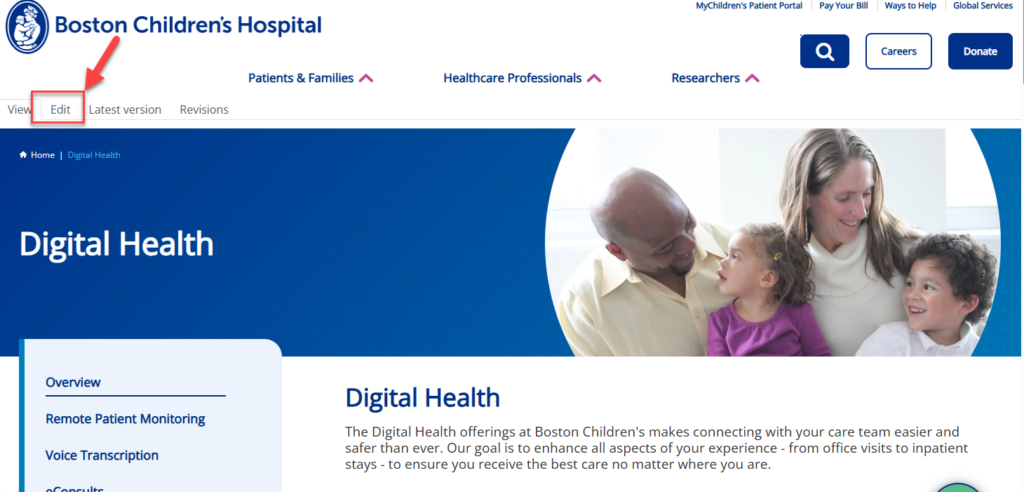
- At the top of the screen, you will see several options, as shown below. The only option you should click on is Edit. Using any other option risks deleting the page from our servers and the live website.
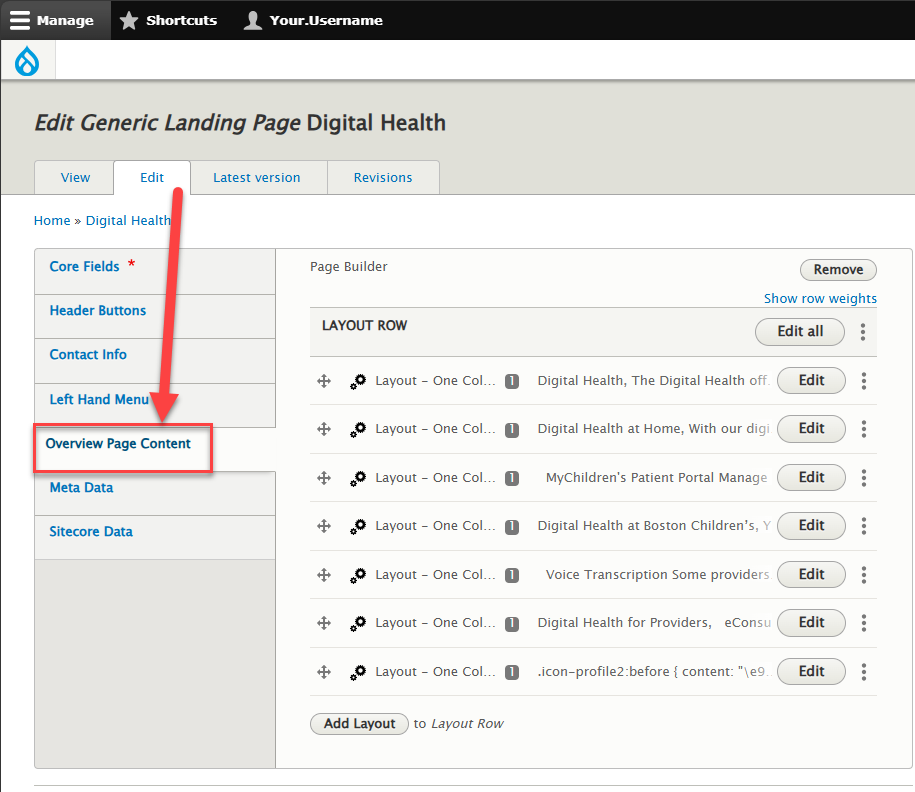
- You will then come to this screen. The only option you should click on is Overview Page Content. Using any other option risks deleting the page from our servers and the live website.
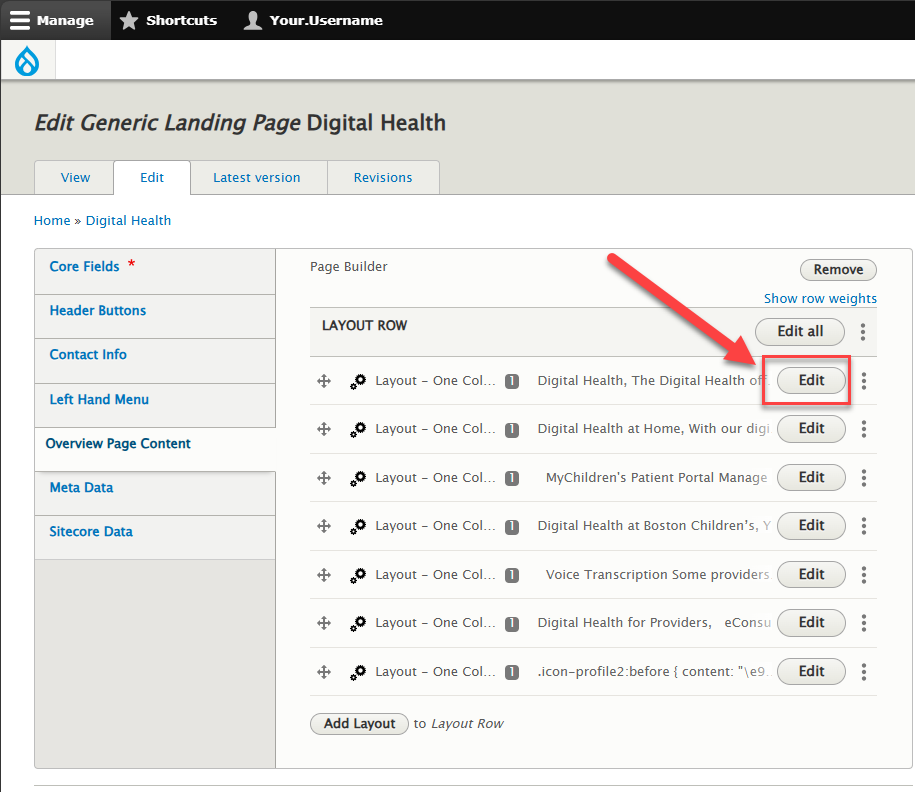
- In this example, all contents are in separate layout rows. You will need one layout row for each component that involves an H2. Components are where you will edit or enter your text. H2s are section headings. In the instance below, you’ll see us edit an existing component inside the layout row. We click ‘Edit‘ to do so:
- Here we come to the edit screen for altering this component, which is a Text component. You can edit any text on this screen, if desired.
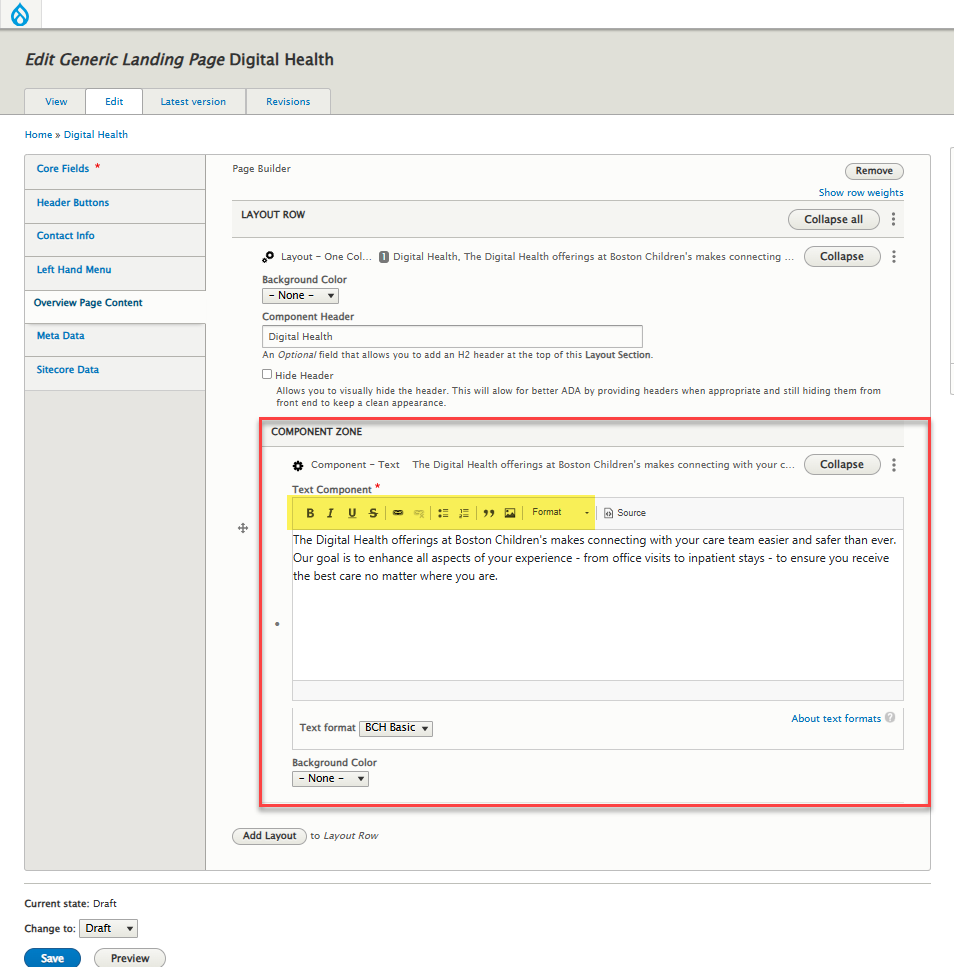
- To add text, place the cursor in the component at the spot where you want to add text and then make the edit. You want to insert unformatted text. What does this mean? It means you’ve stripped all styling that may transfer over from whatever Word document or e-mail you have. There are two ways to do this.
- Copy and paste text into a text document (TextEdit, Notepad) before you insert it onto the page. Then paste the text where you want it to appear.
- You can directly copy and paste text onto the page, but only if you strip all formatting before doing so. On a Mac: Hit command (⌘)-option (alt)-v. On a PC: Hit control-shift-v. This assures all formatting from the old document is stripped.
- Now that text is on the page, you can format using the formatting dropdown. On almost all occasions, you will want your text to remain normal, which is the default when the text is pasted in. If you want a smaller heading at the top of your section, you can choose Heading 3. More is covered on the Text Component in an upcoming Lesson.
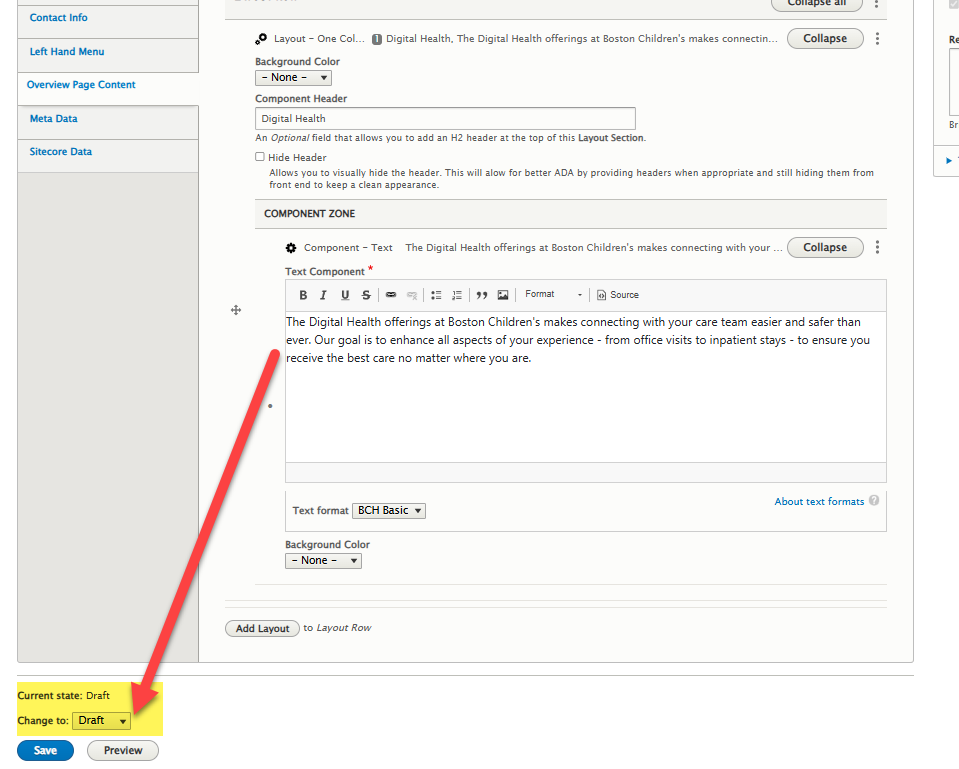
- There is one last step to the process: saving. You will go to the bottom of the page, where the save button is. To avoid overwriting pages or losing your updated data, please change status to draft, before saving. Only after the status has been changed, you should hit save.
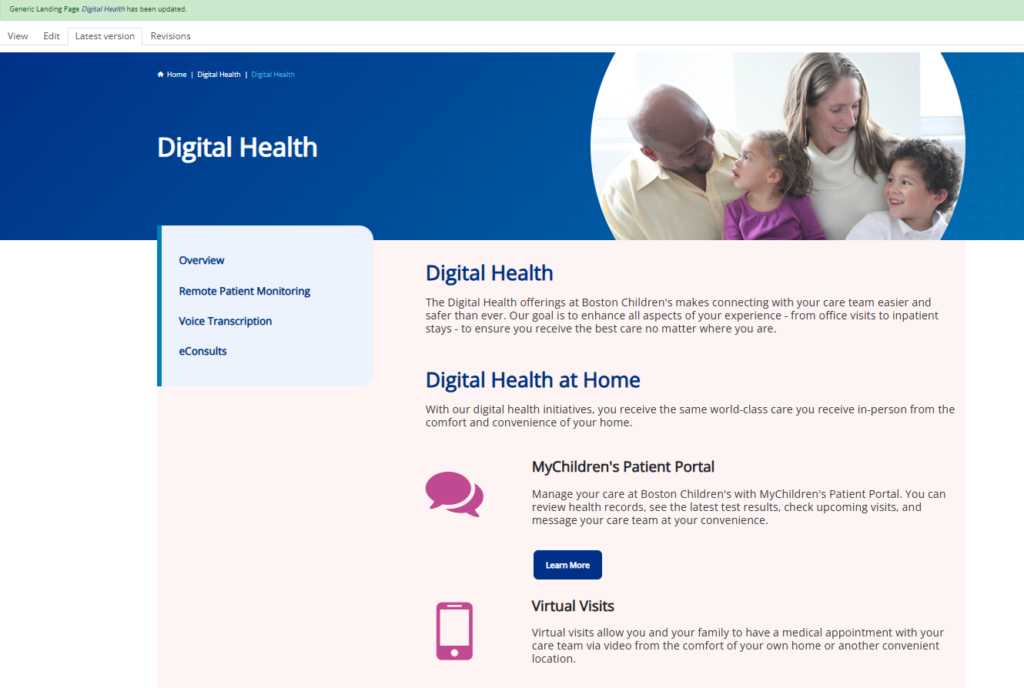
- Here is the page after you saved it. The page has a pink background because it is in Draft status and is not yet live on our website.
Later on in the course we will discuss the workflow process of getting your updates published to the live site.
